New
Making seed tapes is a great winter activity that makes for quick planting during gardening season. Learn how in this one-page guide. Recommended seed spacing for some popular vegetables, herbs and flowers is included.
As you are planning your upcoming garden, a great way to get youth involved is by teaching them to make seed tapes. On planting day, you just simply unroll the strips in the planting furrow and cover it with soil.
Why seed tape?
- Great winter activity!
- It can be done before the garden season, saving time during planting time.
- Makes for quick planting.
- Seed tapes eliminate waste — NO THINNING!
Directions
- Cut paper towel, tissue or newspaper into 2-inch strips and 12 inches long.
- Mix ½ cup flour with enough water mixed in to make it the consistence of thick gravy or glue.
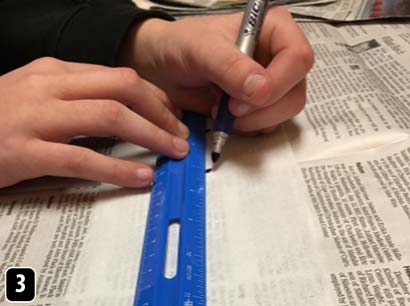
- With a ruler and a pencil, draw small dots every so many inches on the strips of paper/tissue/towel (based on the seed spacing per variety).
- Place one seed on each dot and then place a drop of flour mixture on each seed using a teaspoon, cotton swab or toothpick.
- Allow flour mix to dry completely before moving and storing strips. Strips can be placed into a plastic bag once they have dried. Add a tablespoon of powdered milk in a paper towel to the bag to keep seeds dry.
- Label the bags or slide the corresponding seed packet into the bag so the tapes can be identified later.
- Plant seed tapes based on recommended depths according to seed packet or variety.